วันพฤหัสบดีที่ 18 กรกฎาคม พ.ศ. 2556

การแชร์โฟลเดอร์/เครื่องพิมพ์

Folder and Printer Sharing การแชร์โฟลเดอร์/เครื่องพิมพ์


The Atmosphere of My 2003 Computer Class at 4th Floor of Building1.
They were energetic and very nice schoolkids I have ever experienced.

บรรยากาศห้องเรียนคอมพิวเตอร์  2546 สมัยยังอยู่ชั้น 4  อาคาร 1 
พวกเขาเป็นเด็กนักเรียนที่ขยันขันแข็ง ตั้งใจเรียน และเป็นเด็กดีมากที่สุดรุ่นหนึ่งเท่าที่ครูเคยเจอ
All of us use Windows7 as the operating software, and our computers are connected together within the workgroup of the LAN (local area network). So we should gain the benefit of its sharing capability. Here we go!
ตอนนี้พวกเราล้วนแล้วแต่ใช้ Windows7 เป็นซอฟต์แวร์ระบบปฏิบัติการ (ในห้องเรียน และที่บ้านด้วย)  และเครื่องของพวกเราก็เชื่อมต่อกันเป็นเวิร์กกรุ๊ปในระบบแลน  ดังนั้นเราก็น่าจะใช้ความสามารถในการแชร์ทรัพยากรระหว่างกันได้  ลองดูกัน

1. FOLDER SHARING
        การแชร์โฟลเดอร์

Be sure we have to specify what folder that we want to share?  
ต้องระบุโฟลเดอร์ที่ต้องการแชร์


"BOOKS" is the folder of us to be shared.
ฟลเดอร์ "BOOKS" คือโฟลเดอร์ที่เราอยากแชร์

 Make a right clicking with the folder, the dialogue box appears. Select the "Sharing" tab and the "Advanced Sharing" button
คลิกขวาที่โฟลเดอร์  กรอบโต้ตอบจะปรากฏขึ้น  เราก็เลือกแท็บ 
"Sharing" และปุ่ม 
"Advanced Sharing"


Now the folder has never been shared yet (Not Shared)
ตอนนี้โฟลเดอร์นี้มีสถานภาพไม่ได้ถูกแชร์ไว้

 Properties window of the folder appears and we should select to share it with others. Now we can see the maximum number of users to simultaneously enter to the folder is 20. Then we can click on the "Permission" button.
จะปรากฏหน้าต่างพรอพเพอร์ตีส์ (คุณสมบัติ) ของโฟลเดอร์นี้ขึ้นมา  และเราก็ต้องเลือกว่าจะแชร์กัน  และจะเห็นว่า เพื่อนๆ จะเชื่อมต่อเข้ามาใช้โฟลเดอร์ของเราพร้อมกันได้เต็มที่ 20 เครื่อง แค่นั้น  ต่อมาก็เลือกคลิกปุ่ม "Permission"

Tick the check-box, and we can change the share name or ignore it.
ติ๊กเลือกว่าจะแชร์  จะเปลี่ยน/หรือไม่เปลี่ยนชื่อที่จะแชร์ก็ได้

After clicking on the permission button, the Permissions window shows up, you can add any user e.g. "student" and you can change the permission type of the user.
หลังจากคลิกปุ่ม permission  จะมีหน้าต่างโผล่มาให้เราปรับเปลี่ยนตามความต้องการ

We can add user/ specify his permission level.
เราสามารถเพิ่มยูสเซอร์ / ระบุระดับการอนุญาตใช้งานโฟลเดอร์ของเราแก่เขา

Finally click on the "Apply" button, the folder now has been shared. 
เมื่อเราคลิกปุ่ม "Apply" โฟลเดอร์ของเราก็ได้รับการแบ่งปันให้ใช้ร่วมกันได้ในเครือข่ายแล้ว

Well, our folder has been shared.
Folder ของเราได้รับการแชร์กันใช้เรียบร้อยแล้ว

Sample Special
ตัวอย่าง


This is from my computer (Its hostname is "ALPHA00".), when I click on the "Network" (at the left pane of Windows7 "Computer explorer" )  some computer hostnames appears.  Yes, I want to randomly select any hostname. If the target of mine is "KACHATUCH", yes I would make a double-click on it.
นี่เป็นคอมพิวเตอร์ของครูที่ห้องพักครู (โฮสต์เนมว่า ALPHA00)  เมื่อครูคลิกเลือก Network (อยู่ตรงแถบซ้ายของหน้าต่าง Computer explorer ของ Windows7 ก็จะปรากฏโฮสต์เนมต่างๆ ในเครือข่าย  แน่นอนว่า ครูก็คงต้องสุ่มเลือกเข้าไปใช้เครื่องใดสักเครื่อง  ที่ครูเล็งไว้ก็คือเครื่องที่มีโฮสต์เนมว่า Kachatuch

My Target Hostname is "KACHATUCH"
เครื่องที่ครูเล็งไว้คือ โฮสต์เนมที่ชื่อว่า Kachatuch

The shared folders of the hostname will be appeared. Then we can do a random selection and we can find any other subfolders that we can select to use.
ตอนนี้ก็จะเห็นโฟลเดอร์ที่โฮสต์เนม Kachatuch  เราก็คงต้องสุ่มเลือกโฟลเดอร์  แล้วเราก็จะเห็นโฟลเดอร์ย่อยๆ ที่เราสามารถจะเลือกเข้าไปใช้ได้ 

The Shared Folders of "Kachatuch" appears, any folder could be selected.
  If any shared folder had been selected its subfolders would be revealed. 

แชร์โฟลเดอร์ของโฮสต์เนม "Kachatuch" ก็จะปรากฏขึ้นมาให้เห็น เราสามารถเลือกโฟลเดอร์ไดก็ได้
ถ้าแชร์โฟลเดอร์ใดถูกเลือกเข้าใช้ โฟลเดอร์ย่อยๆ ก็จะได้รับการเปิดตัวออกมาให้เห็นฝเลือกใช้ได้


 2. PRINTER SHARING
        การแชร์พรินเตอร์


 Click the "Start button" of Windows7 desktop, the pop-up menu appears, then select "Devices and Printers", the target printer of us will be appeared.
จากปุ่ม Start ของ Windows7 เราก็เลือก "Devices and Printers"  ก็จะเจอพรินเตอร์ที่เราอยากจะแชร์กันใช้

Select the printer

 Make a right click on the printer icon, the select menu will show up, then select "Printers properties" option.  Then we can operate sharing easily.
คลิกขวาที่รูปพรินเตอร์ จะมีป็อปอัพเมนูโผล่ขึ้นมา ให้เราเลือก "Printers properties" ต่อจากนี้ เราก็คงจะปฏิบัติการแชร์พรินเตอร์ได้ไม่ยากแล้ว...
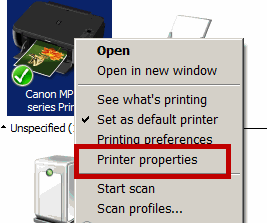
Select : Printer Properties

Click on the "Sharing tab", and we can rename the sharing printer.
เลือกแท็บ Sharing และสามารถเปลี่ยนชื่อพรินเตอร์ที่กำลังจะแชร์ได้ด้วย

Select the Sharing Tab
  
Select to share


source.

occupatech.blogspot.com
แบบฝึกหัด วิชวลเบสิก 6.0

Visul Basic 6.0 : Exercise แบบฝึกหัด วิชวลเบสิก 6.0


Exercise 1
Calendar/Time Display

1 Design a window application that displays the current month, day, and year.  Also, display the current time, updating it every second (look into the Timer control).  Make the window look something like a calendar page.  Play with object properties to make it pretty.

ให้นักเรียนออกแบบหน้าต่างแอ็ปปลิเคชัน ที่แสดงเดือนปัจจุบัน วันที่ และปี  และยังแสดงเวลา ณ ปัจจุบัน ที่จะอัปเดตทุกวิยาทีอีกด้วย (เหมือนกับนาฬิกาจับเวลา)  หน้าต่างแอ็ปปลิเคชันนี้จะคล้ายเหมือนใบปฏิทิน  และให้นักเรียนตกแต่งอ็อบเจ็กต์ต่างๆ ให้ดูดี


2 Configure the properties of the related objects like the followings.
 ทำการตั้งค่าต่างๆ ให้กับอ็อบเจ็กต์ที่เกี่ยวข้อง เหมือนค่าที่กำหนดมาให้ตามนี้

Configuration 1


Configuration2


Configuration3


3  Attach the source codes to the objects. There is only the Timer "timDisplay" object that we have to attach our source codes to.  Although there is no any variable declared, but we have to type the code "Option Explicit" at the General Declarations module.
 ทำการผูกซอร์สโค้ด (รหัสโปรแกรม) เข้ากับอ็อบเจ็กต์  สำหรับงานนี้จะมีเพียงอ็อบเจ็กต์ไทเมอร์ ที่ชื่อ timDisplay เท่านั้น ที่เราจะต้องใส่โค้ดผูกไว้

Source codes that we have to type.


This is the "Sample Special" output of our project ,
(according to our "date/time" format of our machine configuration)
ตัวอย่าง ผลการรันโปรแกรม
(การแสดงผล ขึ้นอยู่กับการตั้งค่า รูปแบบ "วัน/เวลา" ของเครื่องคอมพ์ที่นักเรียนใช้งานอยู่)


Facebook Head Office สำนักงานใหญ่เฟสบุ๊ก

Facebook Head Office สำนักงานใหญ่เฟสบุ๊ก

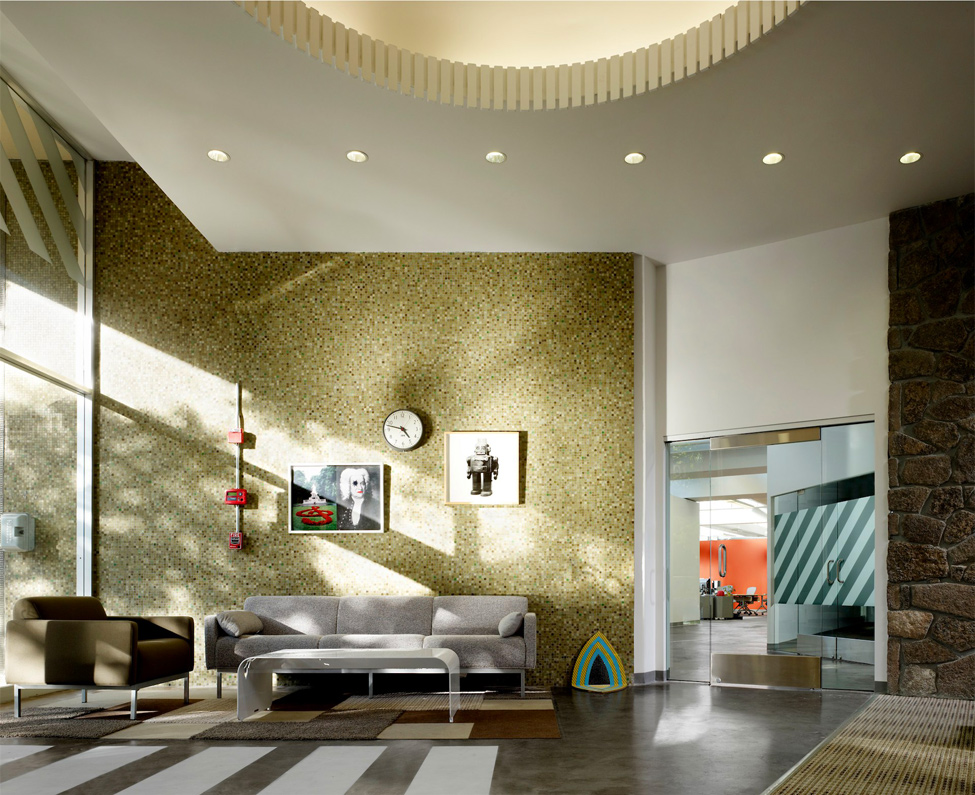
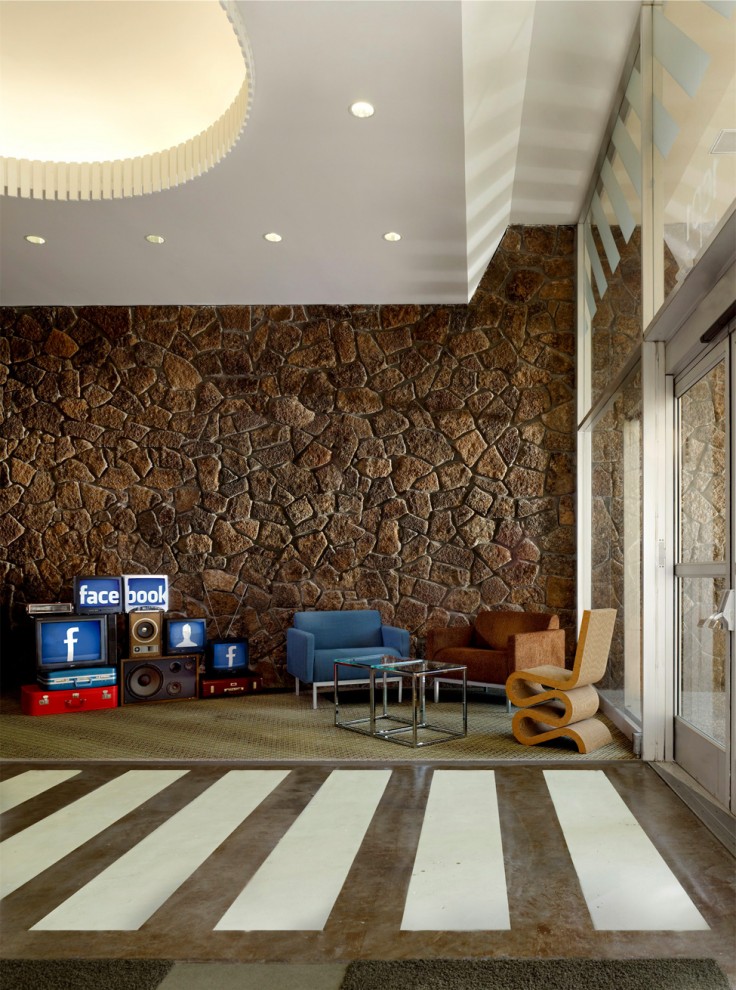
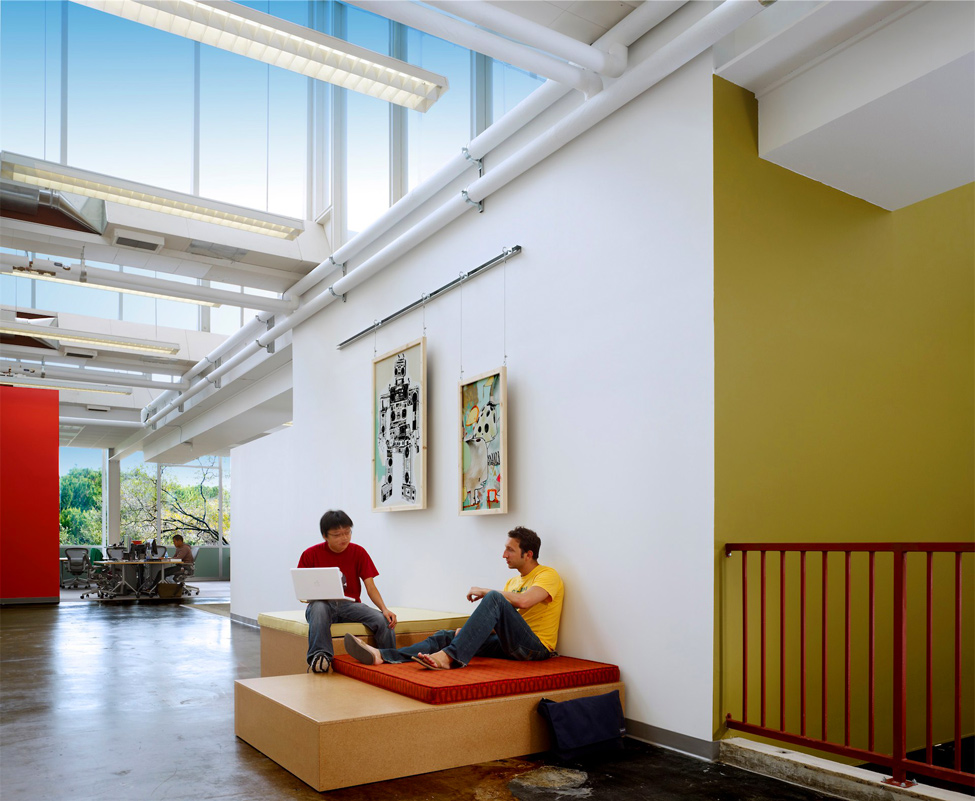
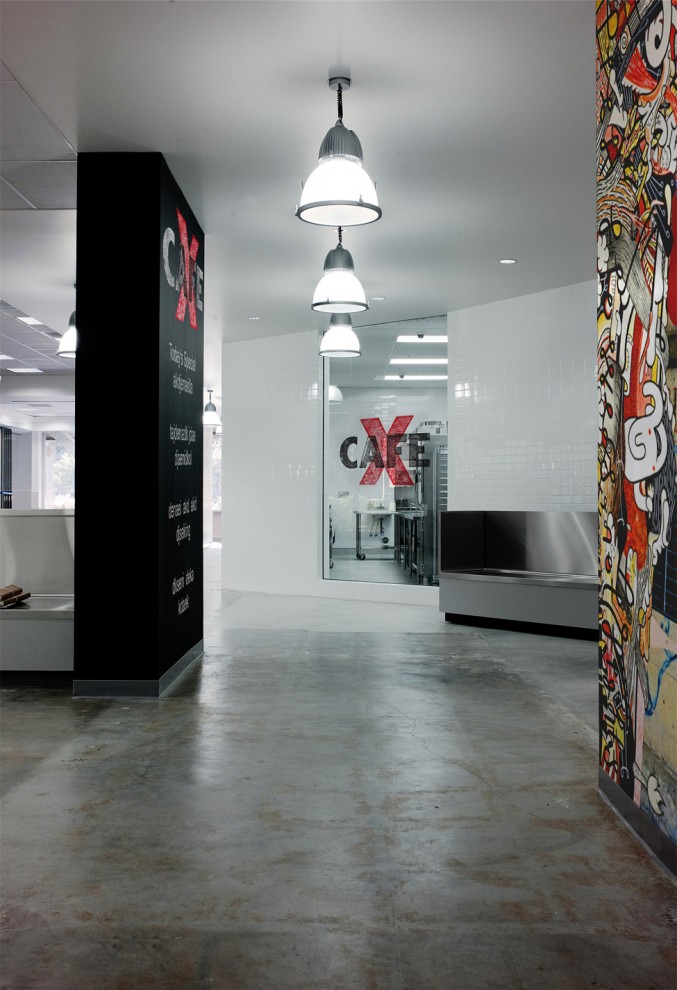
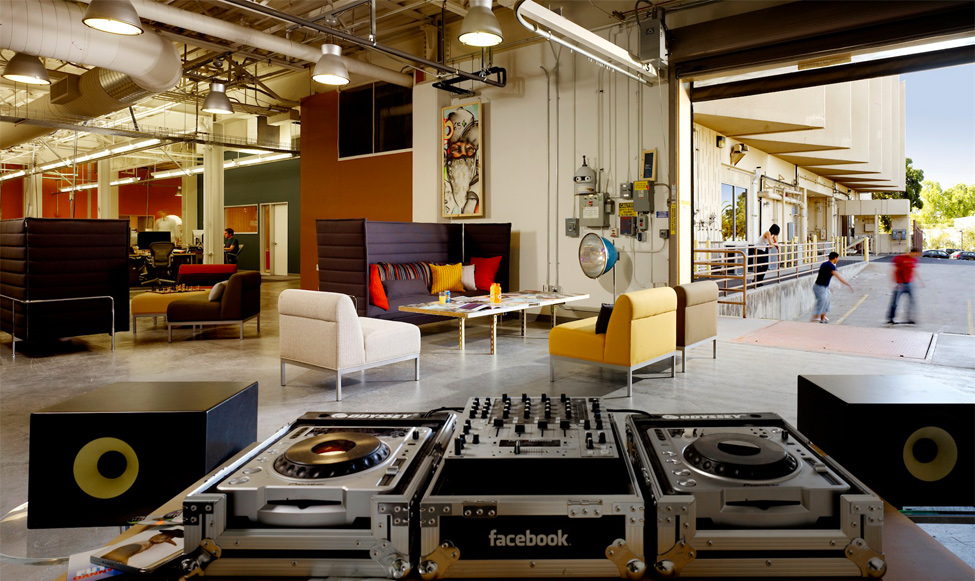
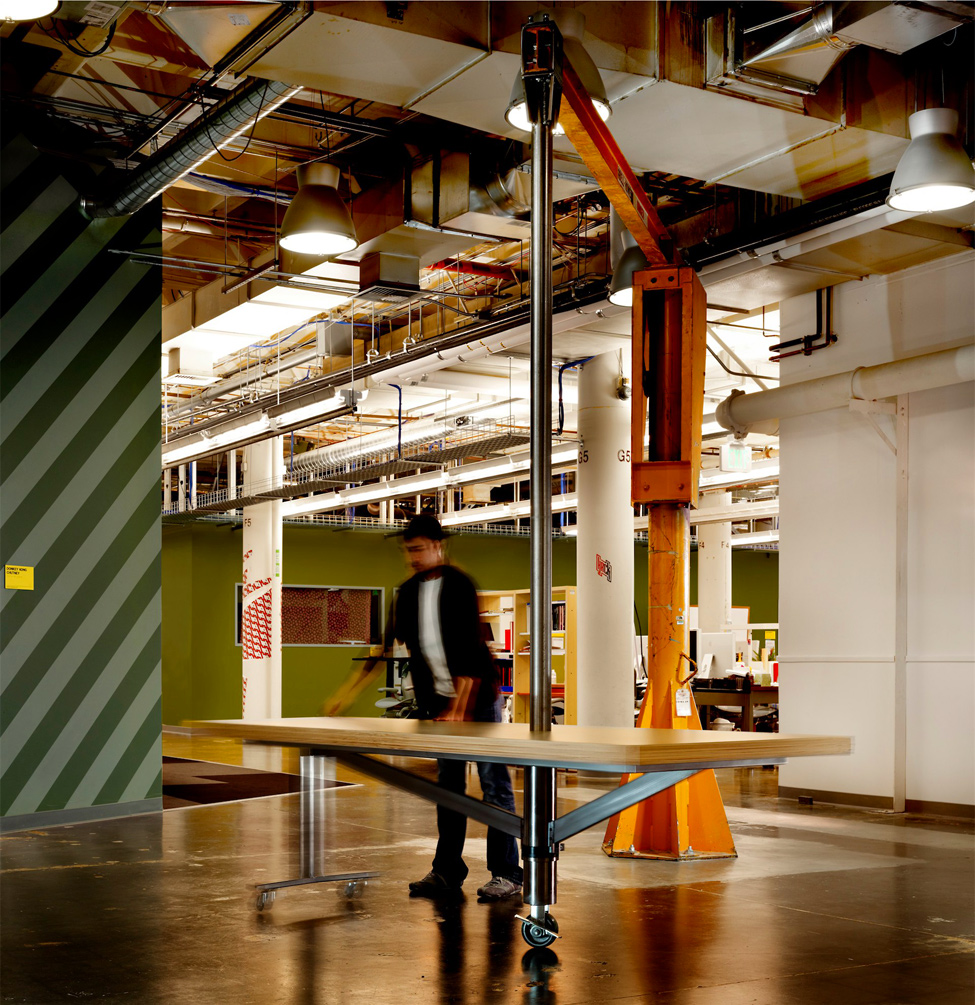
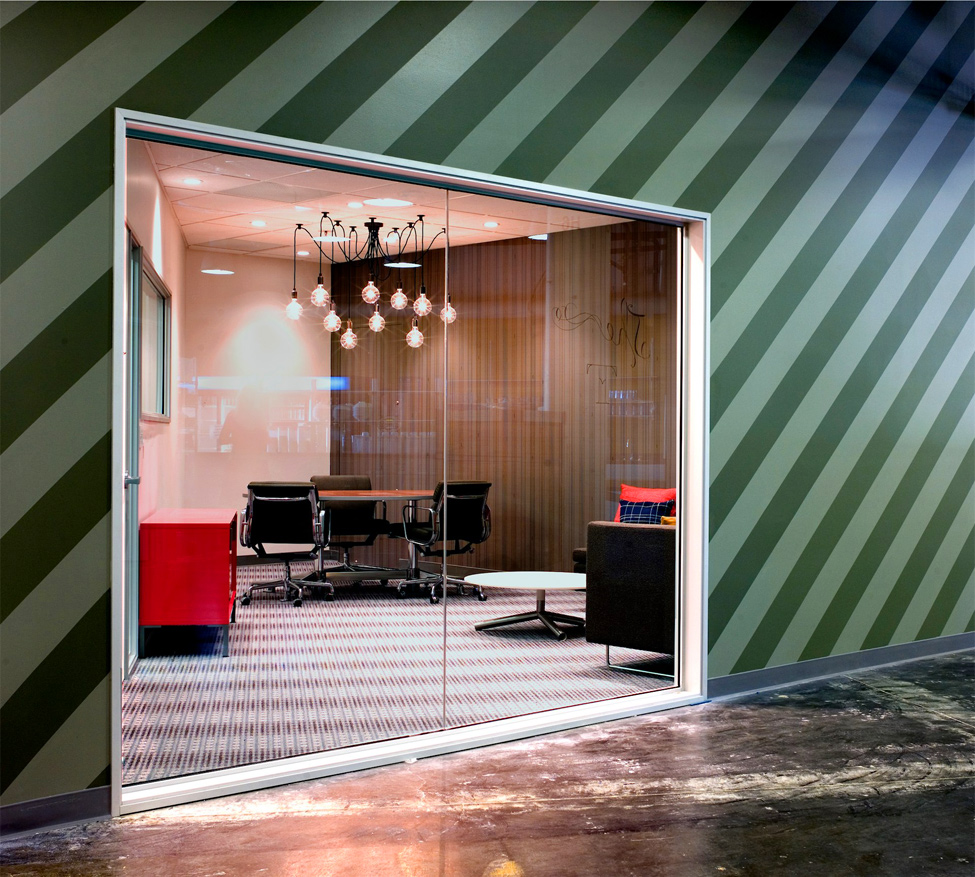
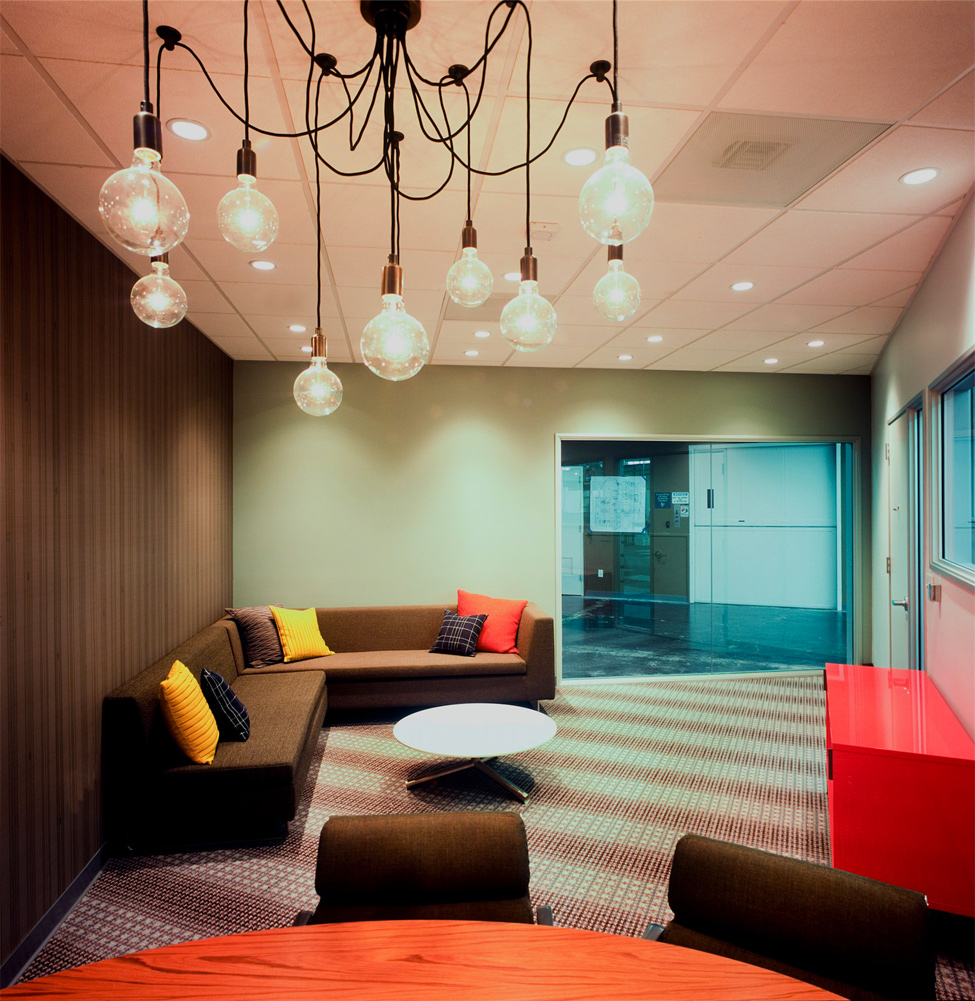
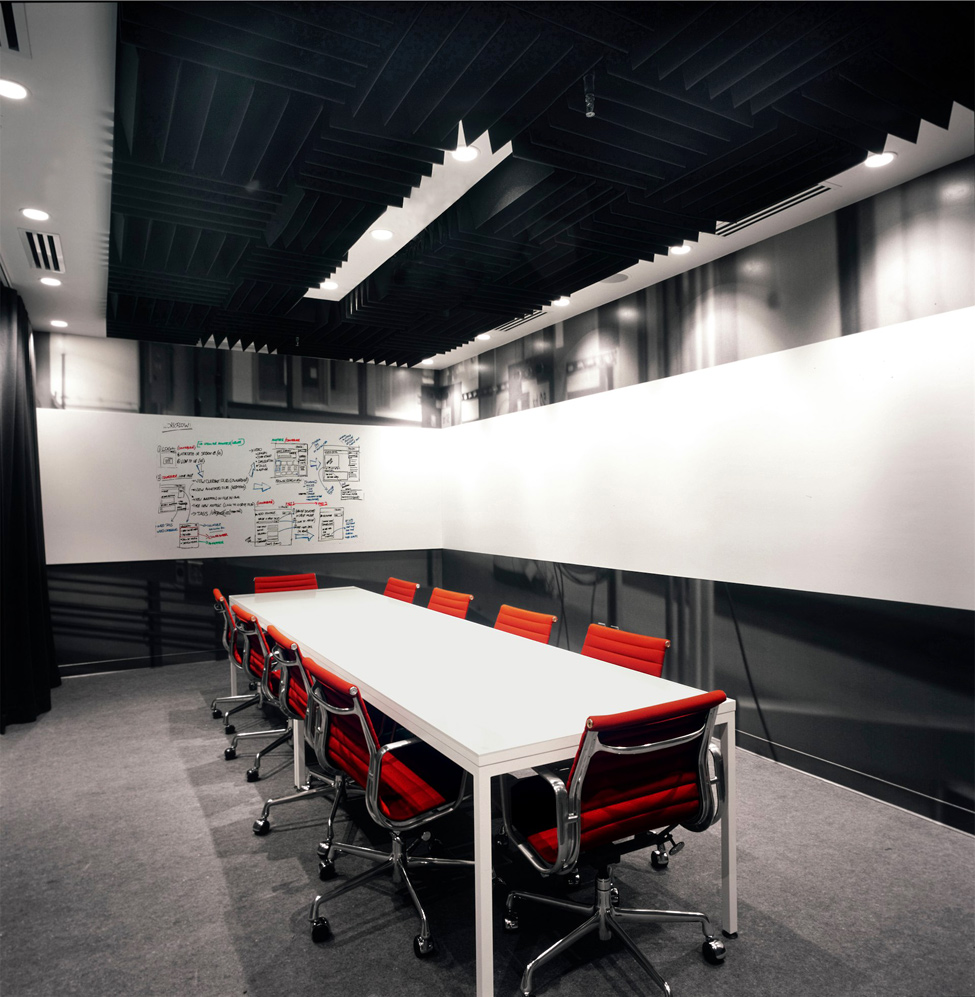
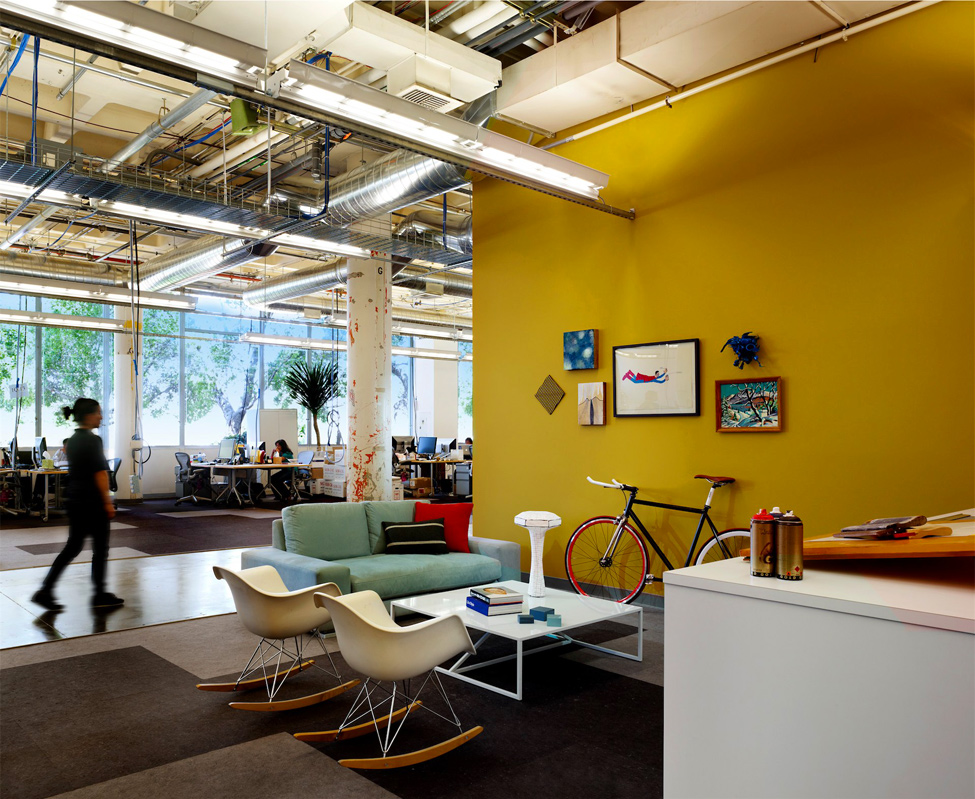
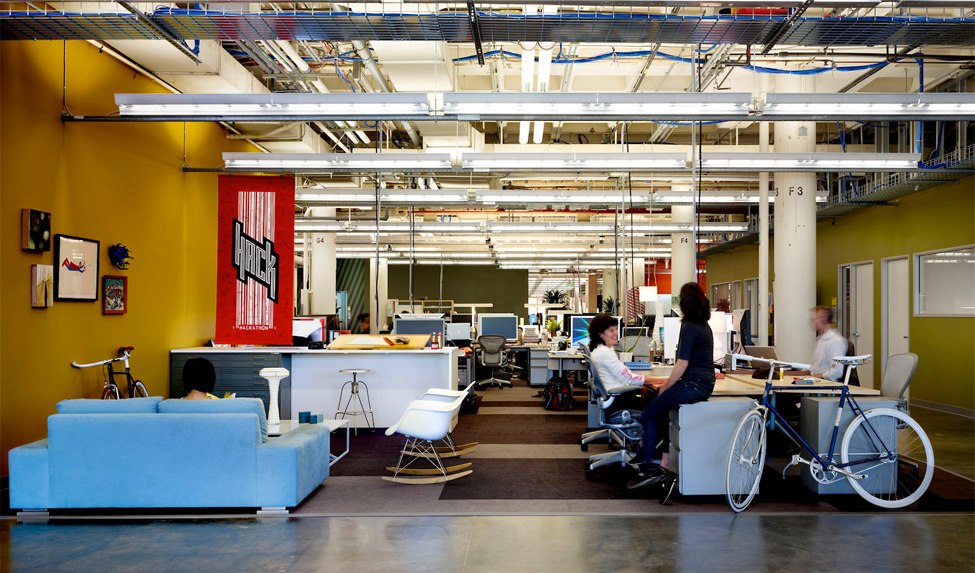
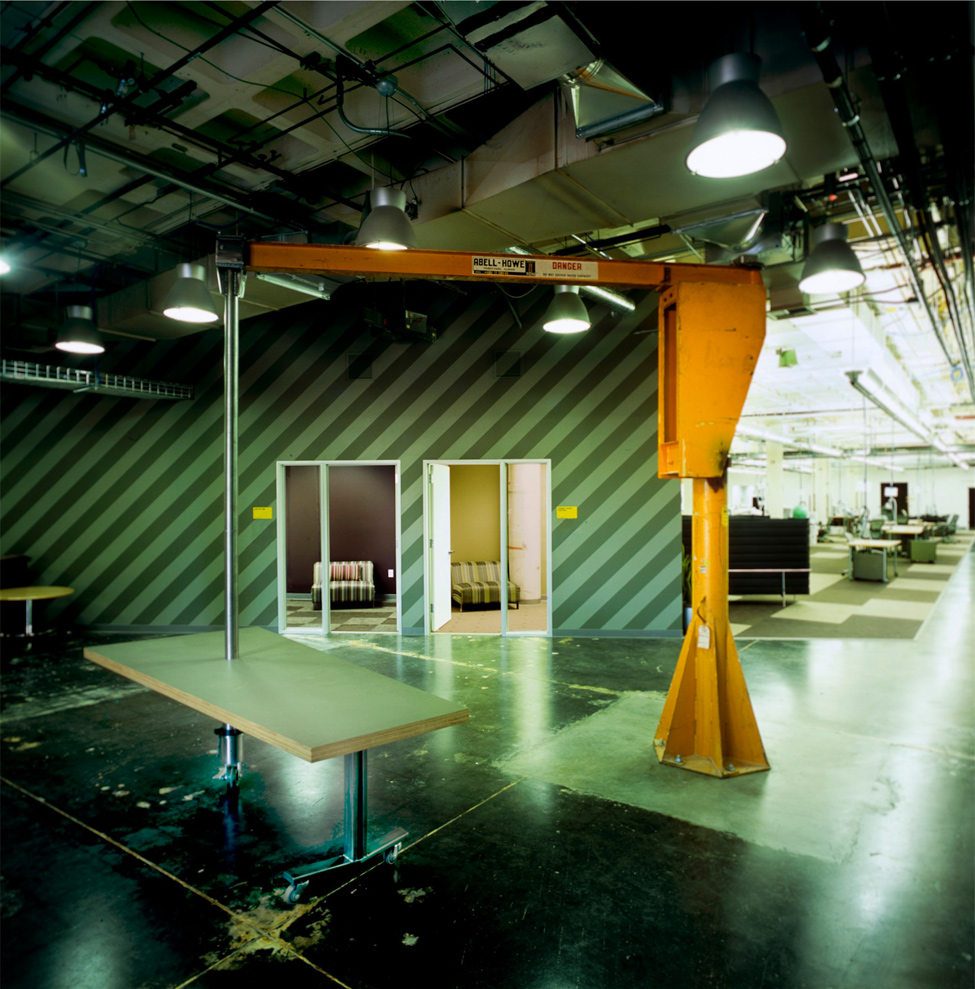
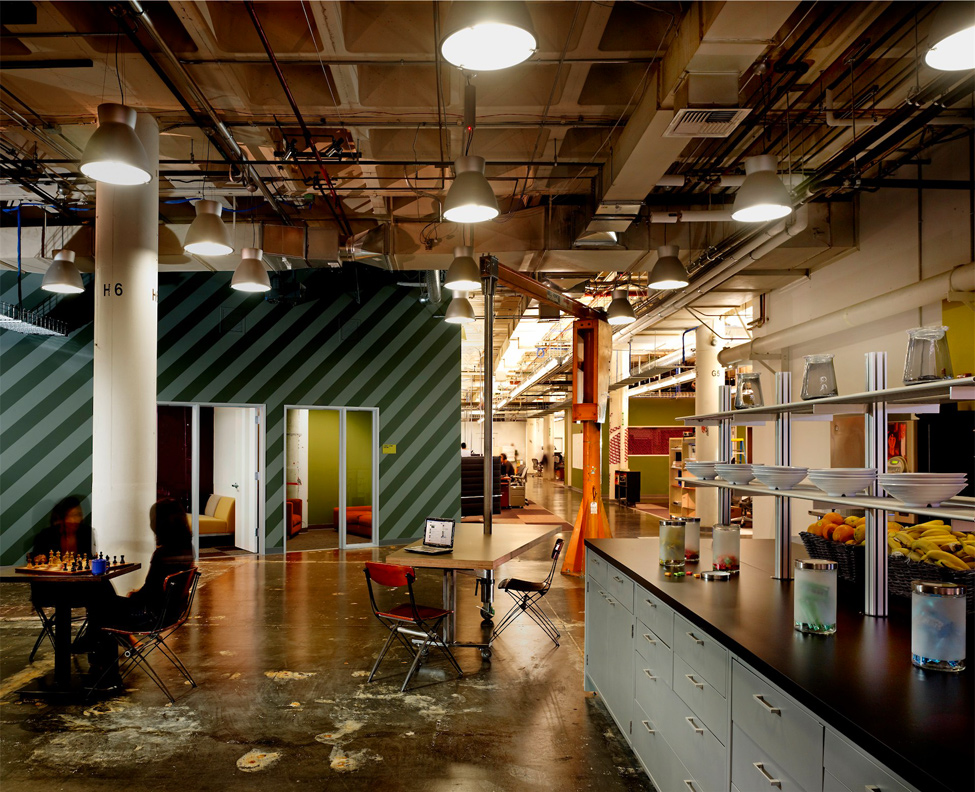
Well, let's look at the world class Information and Technology company, Facebook, that serves millions of people globally. But their Head office is so common like any other office.
เอาล่ะ... นักเรียน  อยากให้เรามาดูบริษัทระดับโลกอย่าง Facebook ที่ให้บริการคนหลายล้านคนทั่วทั้งโลกาใบใหญ่นี้ ดูอ็อฟฟิศสำนักงานใหญ่ของพวกเขาสิ  ธรรมดาๆ บ้านๆ ซะจริงๆ (พวกฝรั่งเขาจะทำอะไรเรียบง่าย ไม่มากพิธี ไม่มีอะไรยุ่งยาก  แต่คุณภาพงานของพวกเขาที่ออกมานั้น สุดยอด)


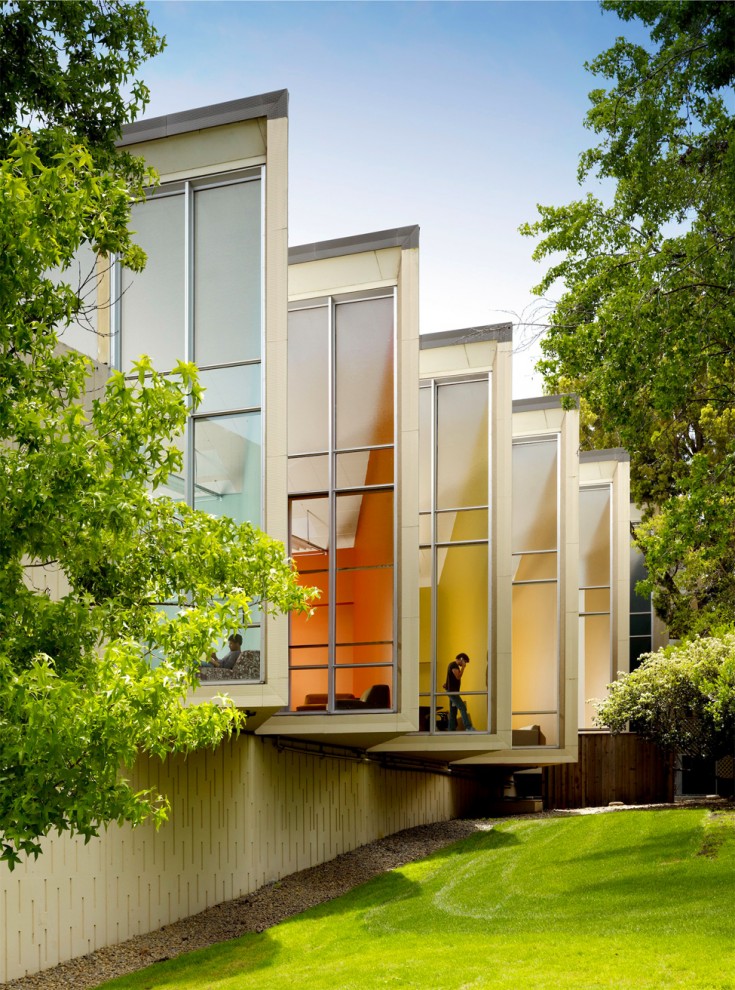
Head Office of Facebook is in Palo Alto, California. 
สำนักงานใหญ่เฟสบุ๊ก  ณ  เมืองพาโลอัลโต มลรัฐแคลิฟอร์เนีย

1309 Head office of Facebook 

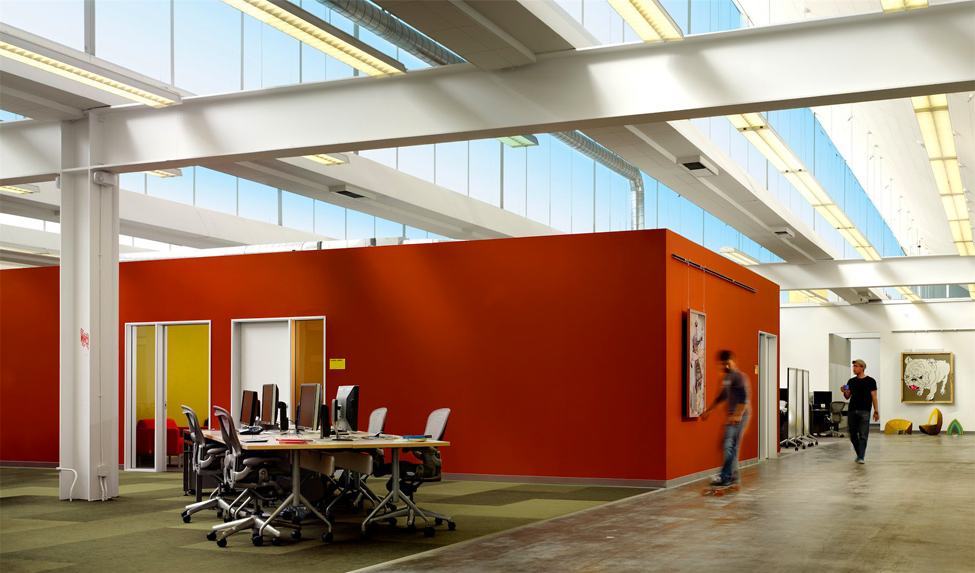
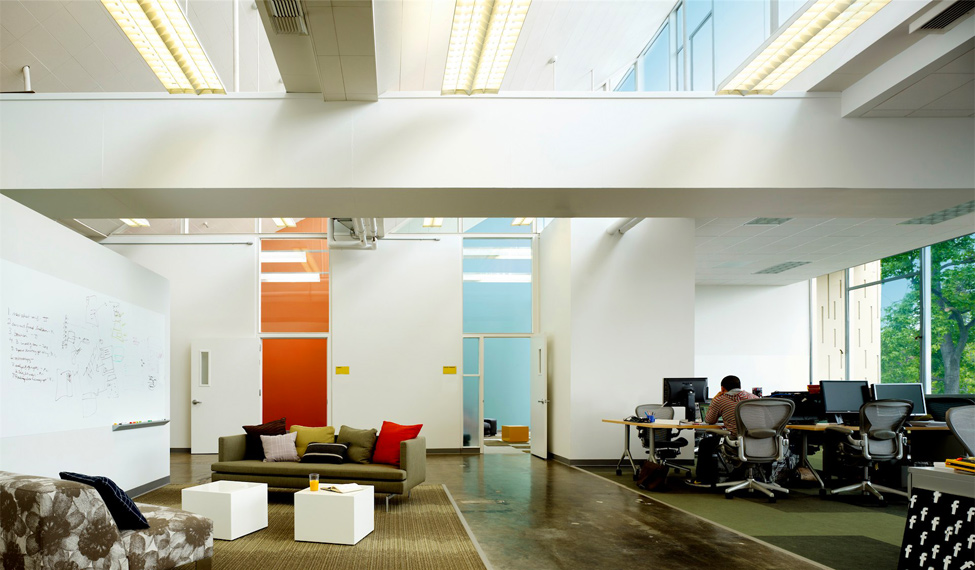
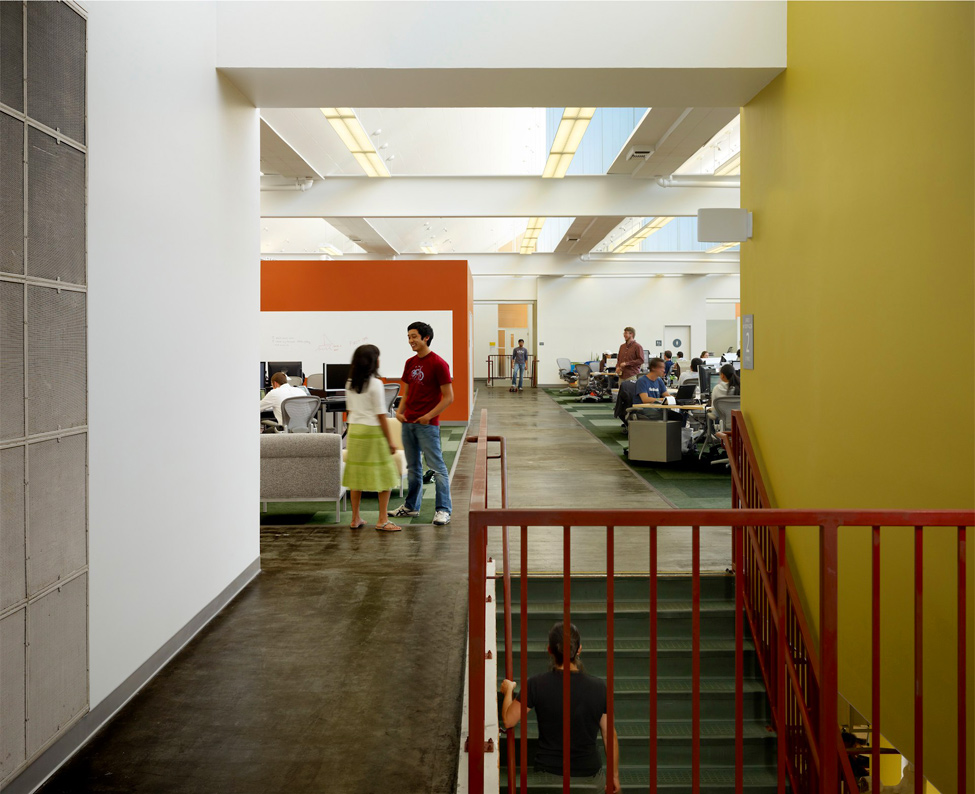
We can see that their office is not sophisticated but very common.
นักเรียนคงเห็นแล้วนะว่า ออฟฟิศใหญ่ของ  Facebook ก็ไม่ได้เลิศหรูสลับซับซ้อนอะไร แบบบ้านๆ ธรรมดาๆ (เพราะความ Hitech  จะไปอยู่ที่ Data Center แทน)

1309 Head office of Facebook
1.
2247 Head office of Facebook
2. 

3198 Head office of Facebook
3. 

4163 Head office of Facebook
4. 

5143 Head office of Facebook
5. 
6135 Head office of Facebook
6.
7133 Head office of Facebook
7. 
8120 Head office of Facebook
8. .
9104 Head office of Facebook
9. .
1097 Head office of Facebook
10.
11129 Head office of Facebook
11.
12107 Head office of Facebook
12.
1385 Head office of Facebook
13.
1482 Head office of Facebook
14.
1578 Head office of Facebook
15. Their office is like any common office, nothing is superb.
 ออฟฟิศดูธรรมดาๆ บ้านๆ เหมือนออฟฟิศทั่วไปที่ไหนๆ นั่นเอง  ไม่มีสิ่งไหนเลยที่เลิศลอยเกินเลย
 
1673 Head office of Facebook
16. The employees has never ware any uniform.
พนักงานของเขา ก็แต่งตัวแบบง่ายๆ บ้านๆ ไม่ต้องมีเครื่องแบบอะไรให้มากพิธี 
1767 Head office of Facebook


อ้างอิง

occupatech.blogspot.com
Google Data Centers ศูนย์ข้อมูลของ Google

Google Data Centers ศูนย์ข้อมูลของ Google

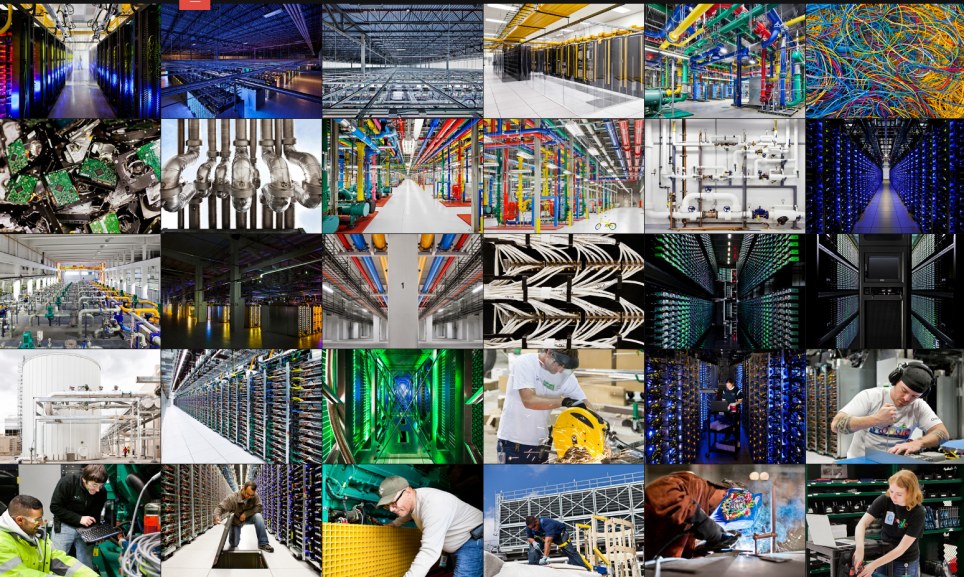
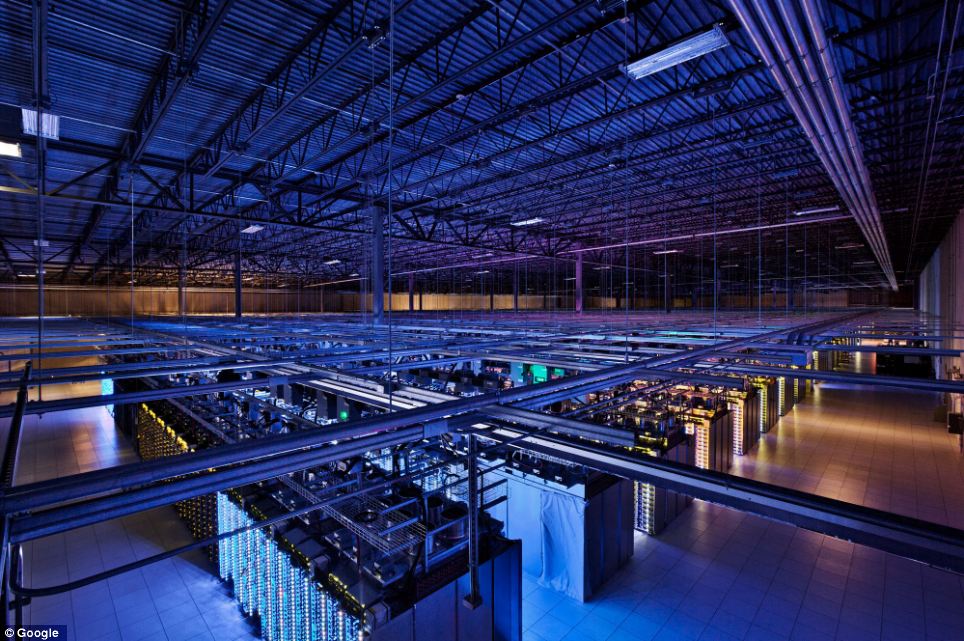
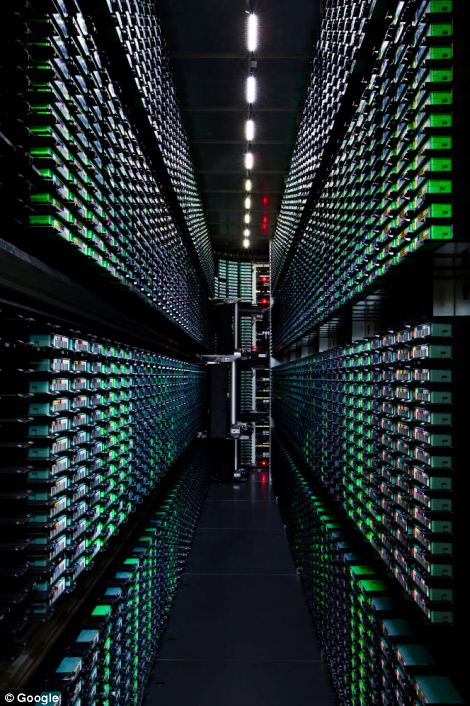
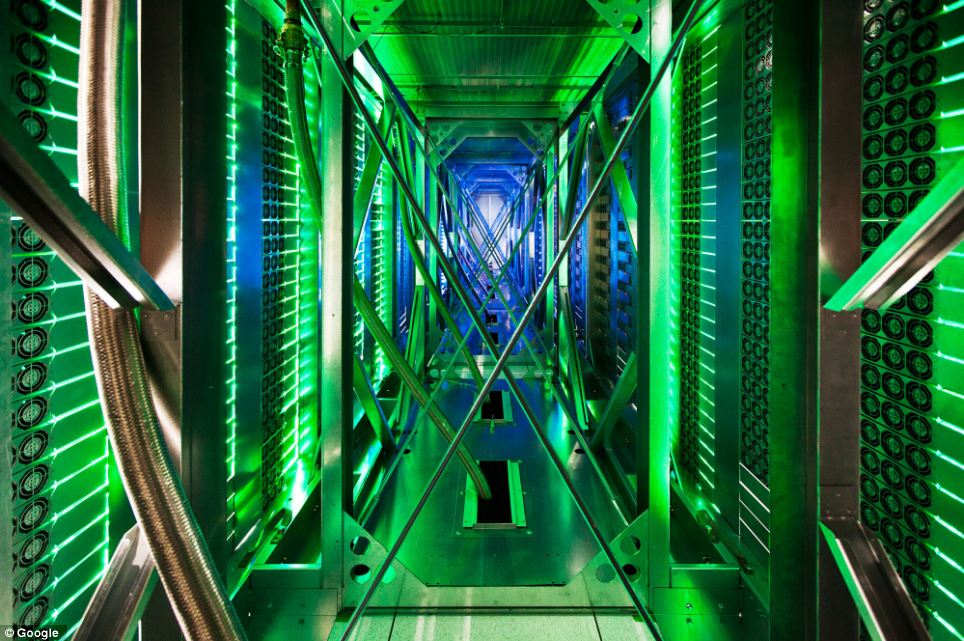
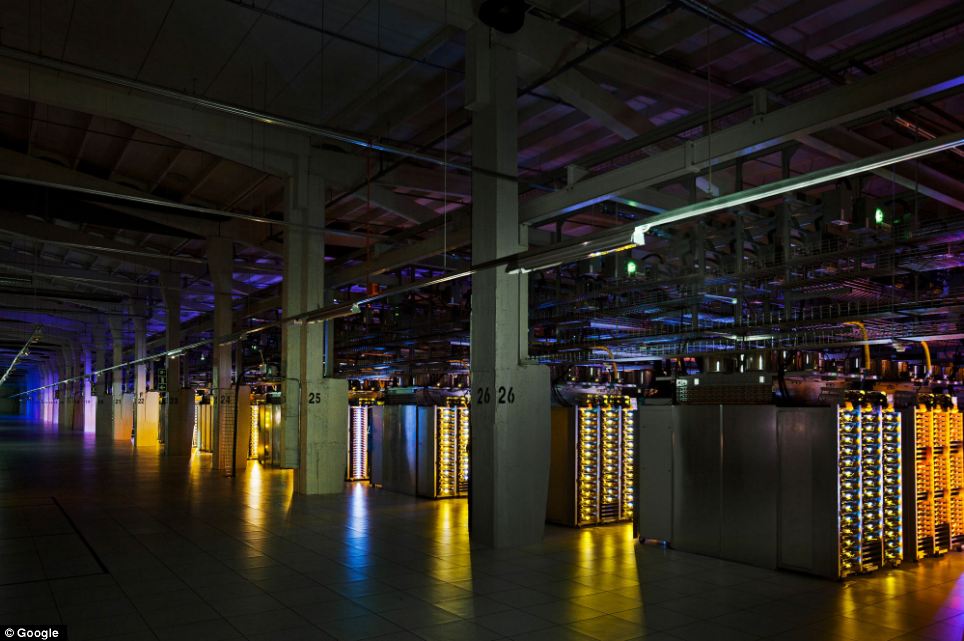
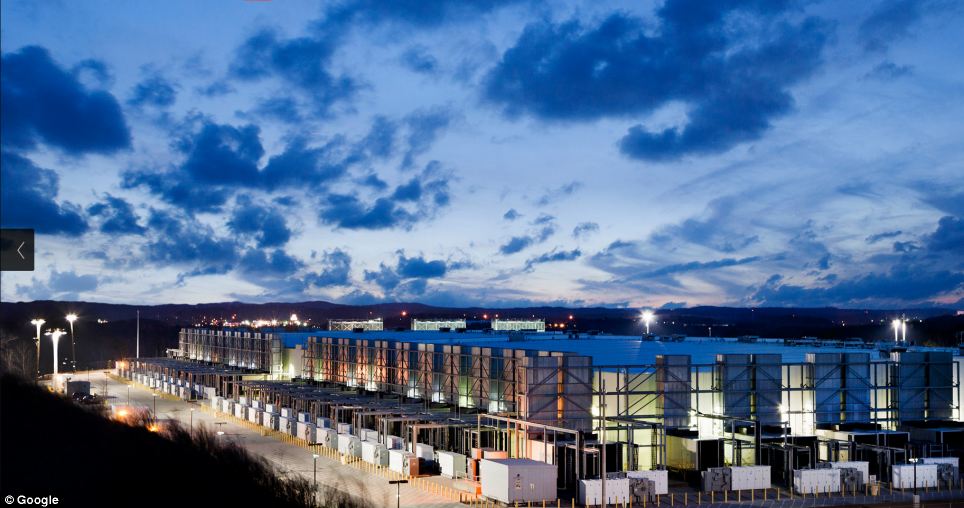
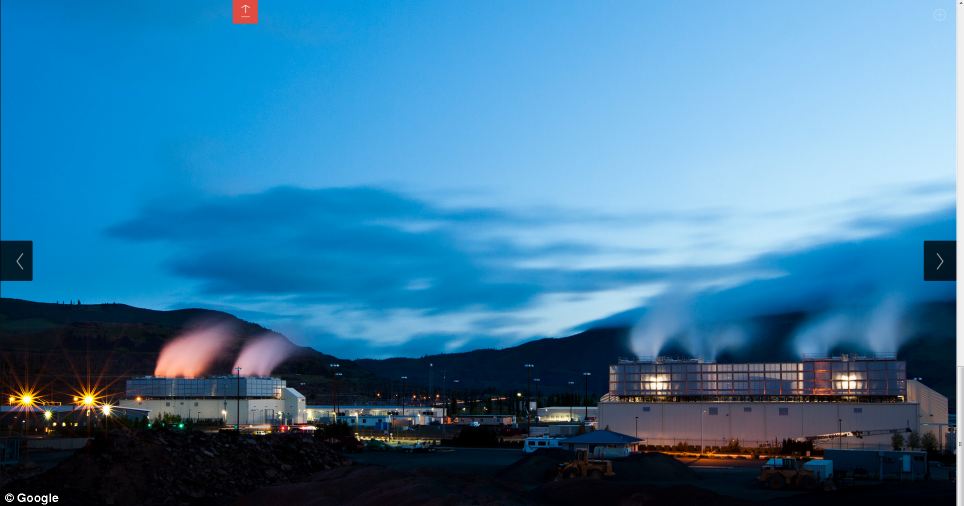
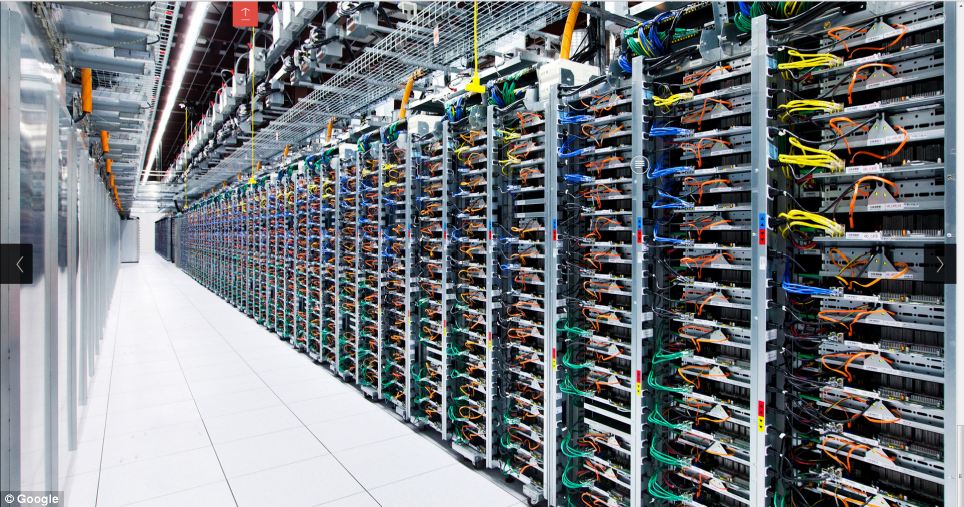
Google has provided us with a rare opportunity to see their data centers around the world, thanks to which every day we can use the services of this global Internet company. This is a real maze of servers that handle online queries into a search engine, show us a video on YouTube, and deliver emails to millions of people. Hundreds of thousands of servers, colorful cables and even bicycles to move the employees of the centers - in this collection you will find and data centers in the former paper mill in Finland, and specially designed server centers in Iowa, USA. 
โอกาสที่ Google จะยอมให้เราเห็นศูนย์ข้อมูลของพวกเขาในหลายๆ แห่งทั่วโลกนั้น ไม่ใช่เรื่องที่ง่ายเลย  เครื่องคอมพิวเตอร์แม่ข่าย (servers) ทั้งหลายที่ตอบสนองการร้องขอของผู้คนที่ออนไลน์ทั่วโลก ไม่ว่าจะเป็น Search Engine (เครื่องมือค้นหาข้อมูล Google)  บริการวิดีโอของ Youtube และการให้บริการ Gmail  ต้องใช้เครื่องคอมพิวเตอร์แม่ข่ายหลายแสนเครื่อง

Inside the internet 1 Дата центры Google
1. Few people have seen data centers Google, and for good reason, because the most important - is the security of our data.Therefore, each center is carefully protected.
เหตุผลเรื่องความปลอดภัย เราจึงไม่ค่อยได้เห็นศูนย์ข้อมูลของกูเกิล

Inside the internet 2 Дата центры Google
2. Despite the large number of Google employees around the world, only a handful of insiders has access to the servers.
แม้จะเป็นพนักงานของกูเกิลที่มีมากมายทั่วโลก  ก็คงเป็นแค่คนวงในไม่กี่คนที่สามารถเข้าถึงเครื่องแม่ข่ายได้

Inside the internet 3 Дата центры Google
3. Now you can see the first images which capture the people, places and equipment, through which runs Google. 
ภาพแรกๆ ที่เราเห็นจะทำการจับภาพผู้คน ตำแหน่งที่อยู่ และอุปกรณ์ ซึ่งจะรันผ่านกูเกิล

Inside the internet 4 Дата центры Google
4. In this post photos provided eight data centers in the U.S., Finland and Belgium. 
ศูนย์คอมพิวเตอร์ของกูเกิล  8 ศูนย์ ในสามประเทศคือ สหรัฐอเมริกา  ฟินแลนด์ และเบลเยียม

Inside the internet 5 Дата центры Google
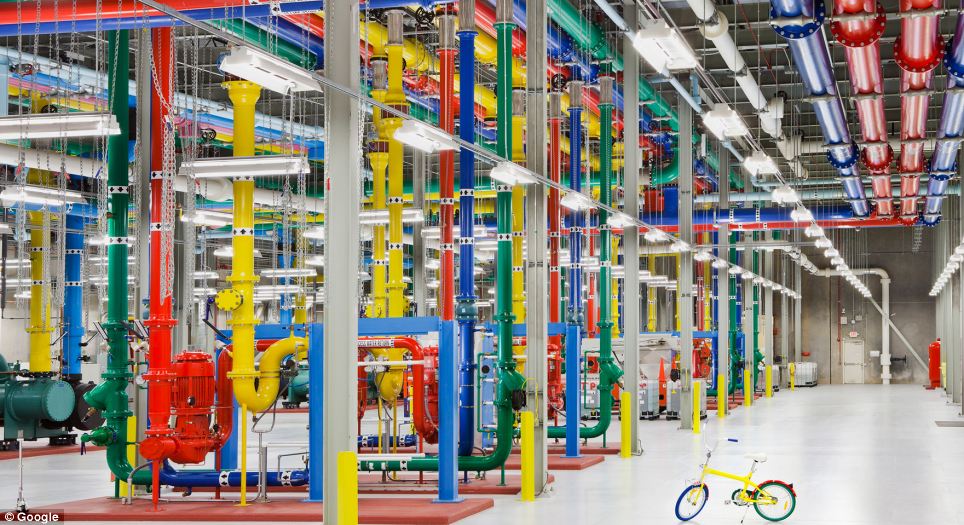
5. Now Google is also building data centers in Hong Kong, Taiwan, Singapore and Chile.
กูเกิลยังมีศูนย์ข้อมูลที่ฮ่องกง  สิงคโปร์  ไต้หวัน และประเทศชิลี อีกด้วย (สังเกตว่า พวกเขาใช้จักรยานปั่นไปหาจุดต่างๆ ขืนเดินไปคงไม่ไหว เพราะมันคงกว้างขวาง เสียเวลากว่าจะไปถึง)

Inside the internet 6 Дата центры Google
6. Surprise! Hmm, so this is what the guards in the data centers Google.
นี่เป็นการ์ดเฝ้าศุนย์ข้อมูลของกูเกิลเขาล่ะนะ

Inside the internet 7 Дата центры Google
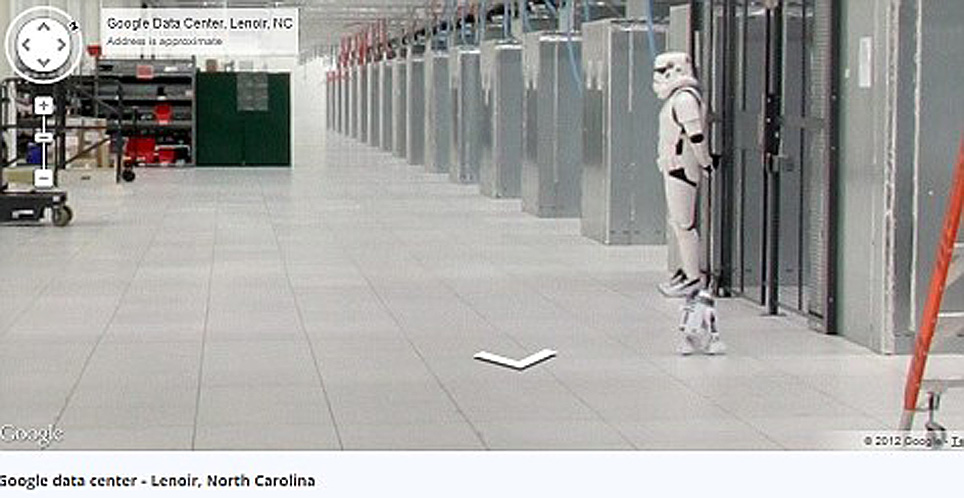
7.Takzhe to share Google's 'Street View' you can take a virtual tour of the data center in North Carolina.
ศูนย์ที่มลรัฐนอร์ธแคโรไลนา

Inside the internet 8 Дата центры Google
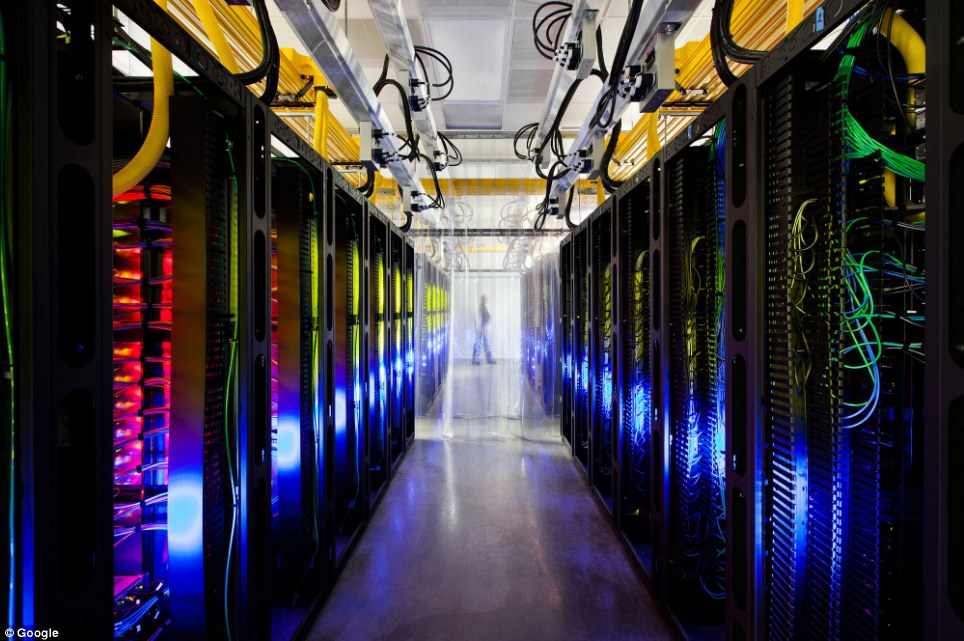
8. One of the many server data center in Iowa, USA, where the routes and switches allow data centers to communicate with each other. Fiber-optic cable connecting the server mounted on the ceiling.
ศุนย์ที่มลรัฐไอโอวา  สายใยแก้วนำแสง (Fiber-optic cable) ที่มาเชื่อมต่อกับเครื่องแม่ข่ายนั้น ห้อยลงมาจากเพดานหลังคา

Inside the internet 9 Дата центры Google
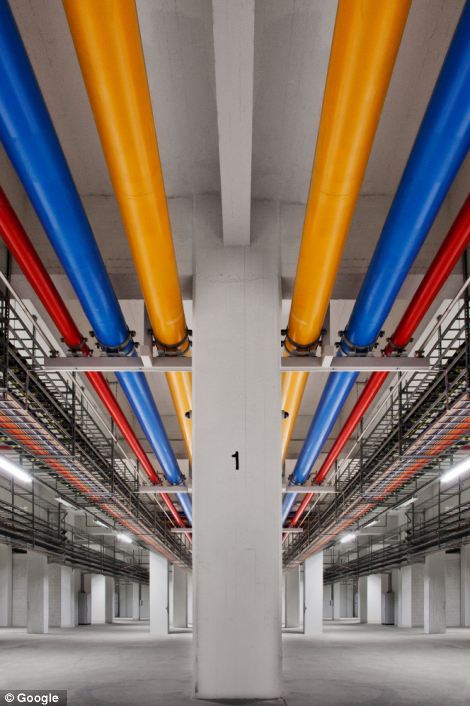
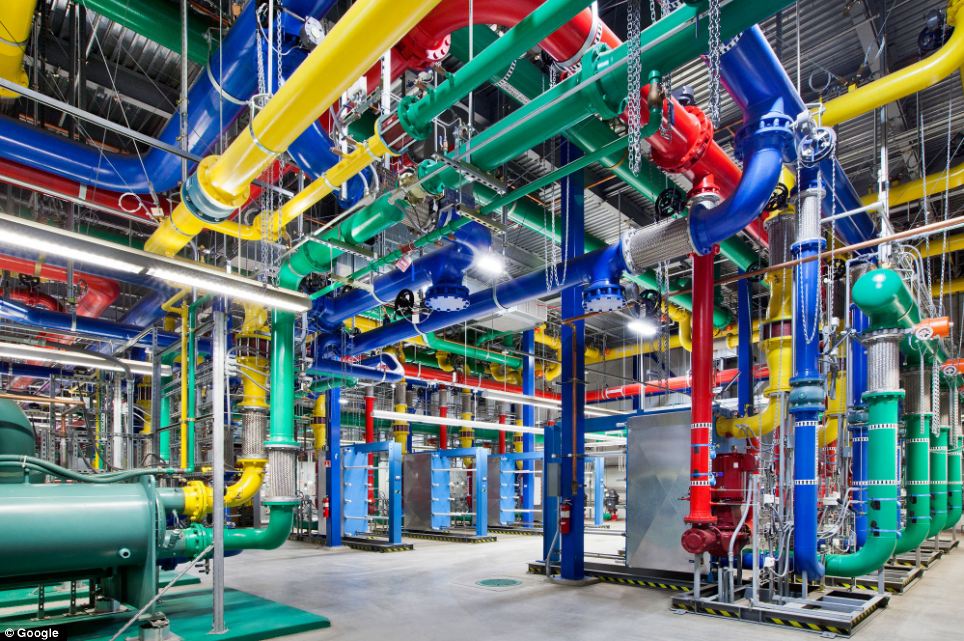
9. Even the lines in the centers painted in company colors Google. For these colorful water pipes travels around the center in Oregon. Blue pipes supply cold water, red - hot water is returned to a special chamber that it has cooled down.
ศุนย์ที่มลรัฐโอเรกอน  จะสังเกตว่า สีของท่อต่างๆ จะใช้สีของกูเกิลเป็นสัญลักษณ์  ท่อน้ำสีน้ำเงินเป็นน้ำเย็น นำไประบายความร้อนออกมาจากระบบ  แล้วส่งกลับเป็นน้ำร้อนมาตามท่อน้ำสีแดง (ระบบระบายความร้อน ทำนองเดียวกับเครื่องรถยนต์นั่นแหละ)

Inside the internet 10 Дата центры Google
10. In Hamina, Finland, Google has decided to restore the old paper mill and stay on its territory, not far from the cool waters of the Gulf of Finland.
นี่เป็นศูนย์ข้อมูลของกูเกิลในประเทศฟินแลนด์ อาศัยโรงงานกระดาษเดิมมาดัดแปลง (ฟินแลนด์เป็นประเทศยักษ์ใหญ่ของโลกในการผลิตกระดาษจากไม้สน)

Inside the internet 11 Дата центры Google
11. Google server center in Douglas, Iowa.  
ที่มลรัฐไอโอวา

Inside the internet 12 Дата центры Google
12. This server facility in The Dalles, Oregon, USA.
ที่มลรัฐโอเรกอน

Inside the internet 13 Дата центры Google
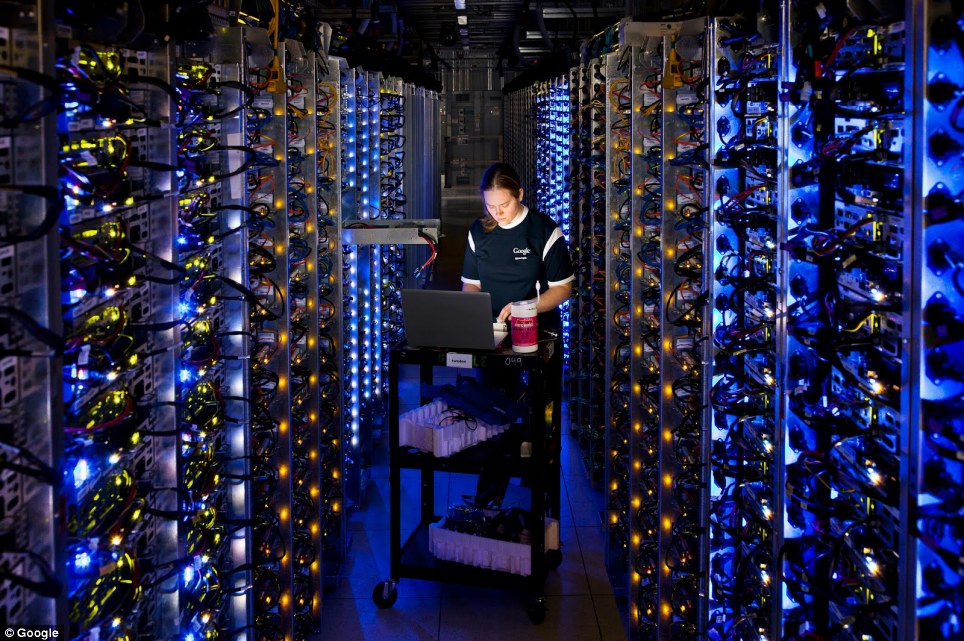
13. Dennis Harwood, an engineer Google, diagnoses overheated processor. For more than 10 years, Google has built some of the world's most powerful servers.
วิศวกรของกูเกิลกำลังตรวจหาสาเหตุที่หน่วยประมวลผลมีความร้อนเกิดขึ้นสูงเกินไป (Overheated)

Inside the internet 14 Дата центры Google
14. Google data center in Council Bluffs, Iowa, USA.
ศูนย์ที่มลรัฐไอโอวา

Inside the internet 15 Дата центры Google
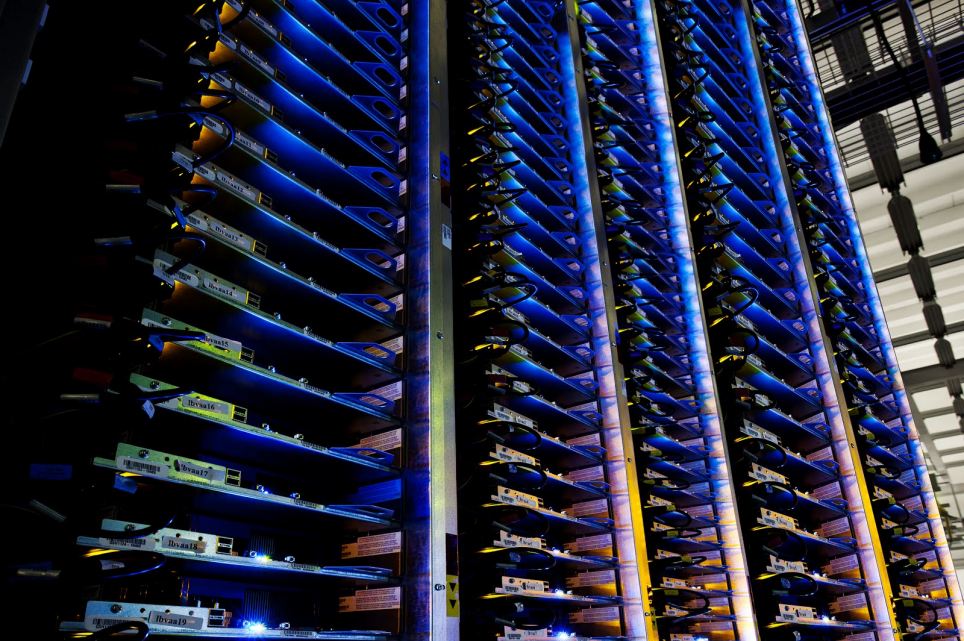
15. Each server has four interfaces, marked by lines of different colors. The colors in all centers of Google standard that facilitates the work during equipment maintenance.
เครื่องแม่ข่ายแต่ละตัว จะมีช่องทางการติดต่อ (Interface) 4 ช่องสัญญาณที่เป็นสีต่างกัน ก็คือสีสัญลักษณ์ของกูเกิลนั่นแหละ


อ้างอิง

occupatech.blogspot.com